How to add animations to your website
HTML animations made easy!
Unfortunately, for most website owners, adding animations isn’t as easy as it looks. It requires knowledge of HTML, CSS and then finally Javascript or jQuery if you want to queue them correctly.
While you could learn all of that, why not save your time and brain cells! Scroll Triggered Animations gives you all the tools and features you need to add animations to your website.
Default Animations – The easiest way within WordPress to add Animations on scroll
First, navigate to the ‘Default Animations tab’.
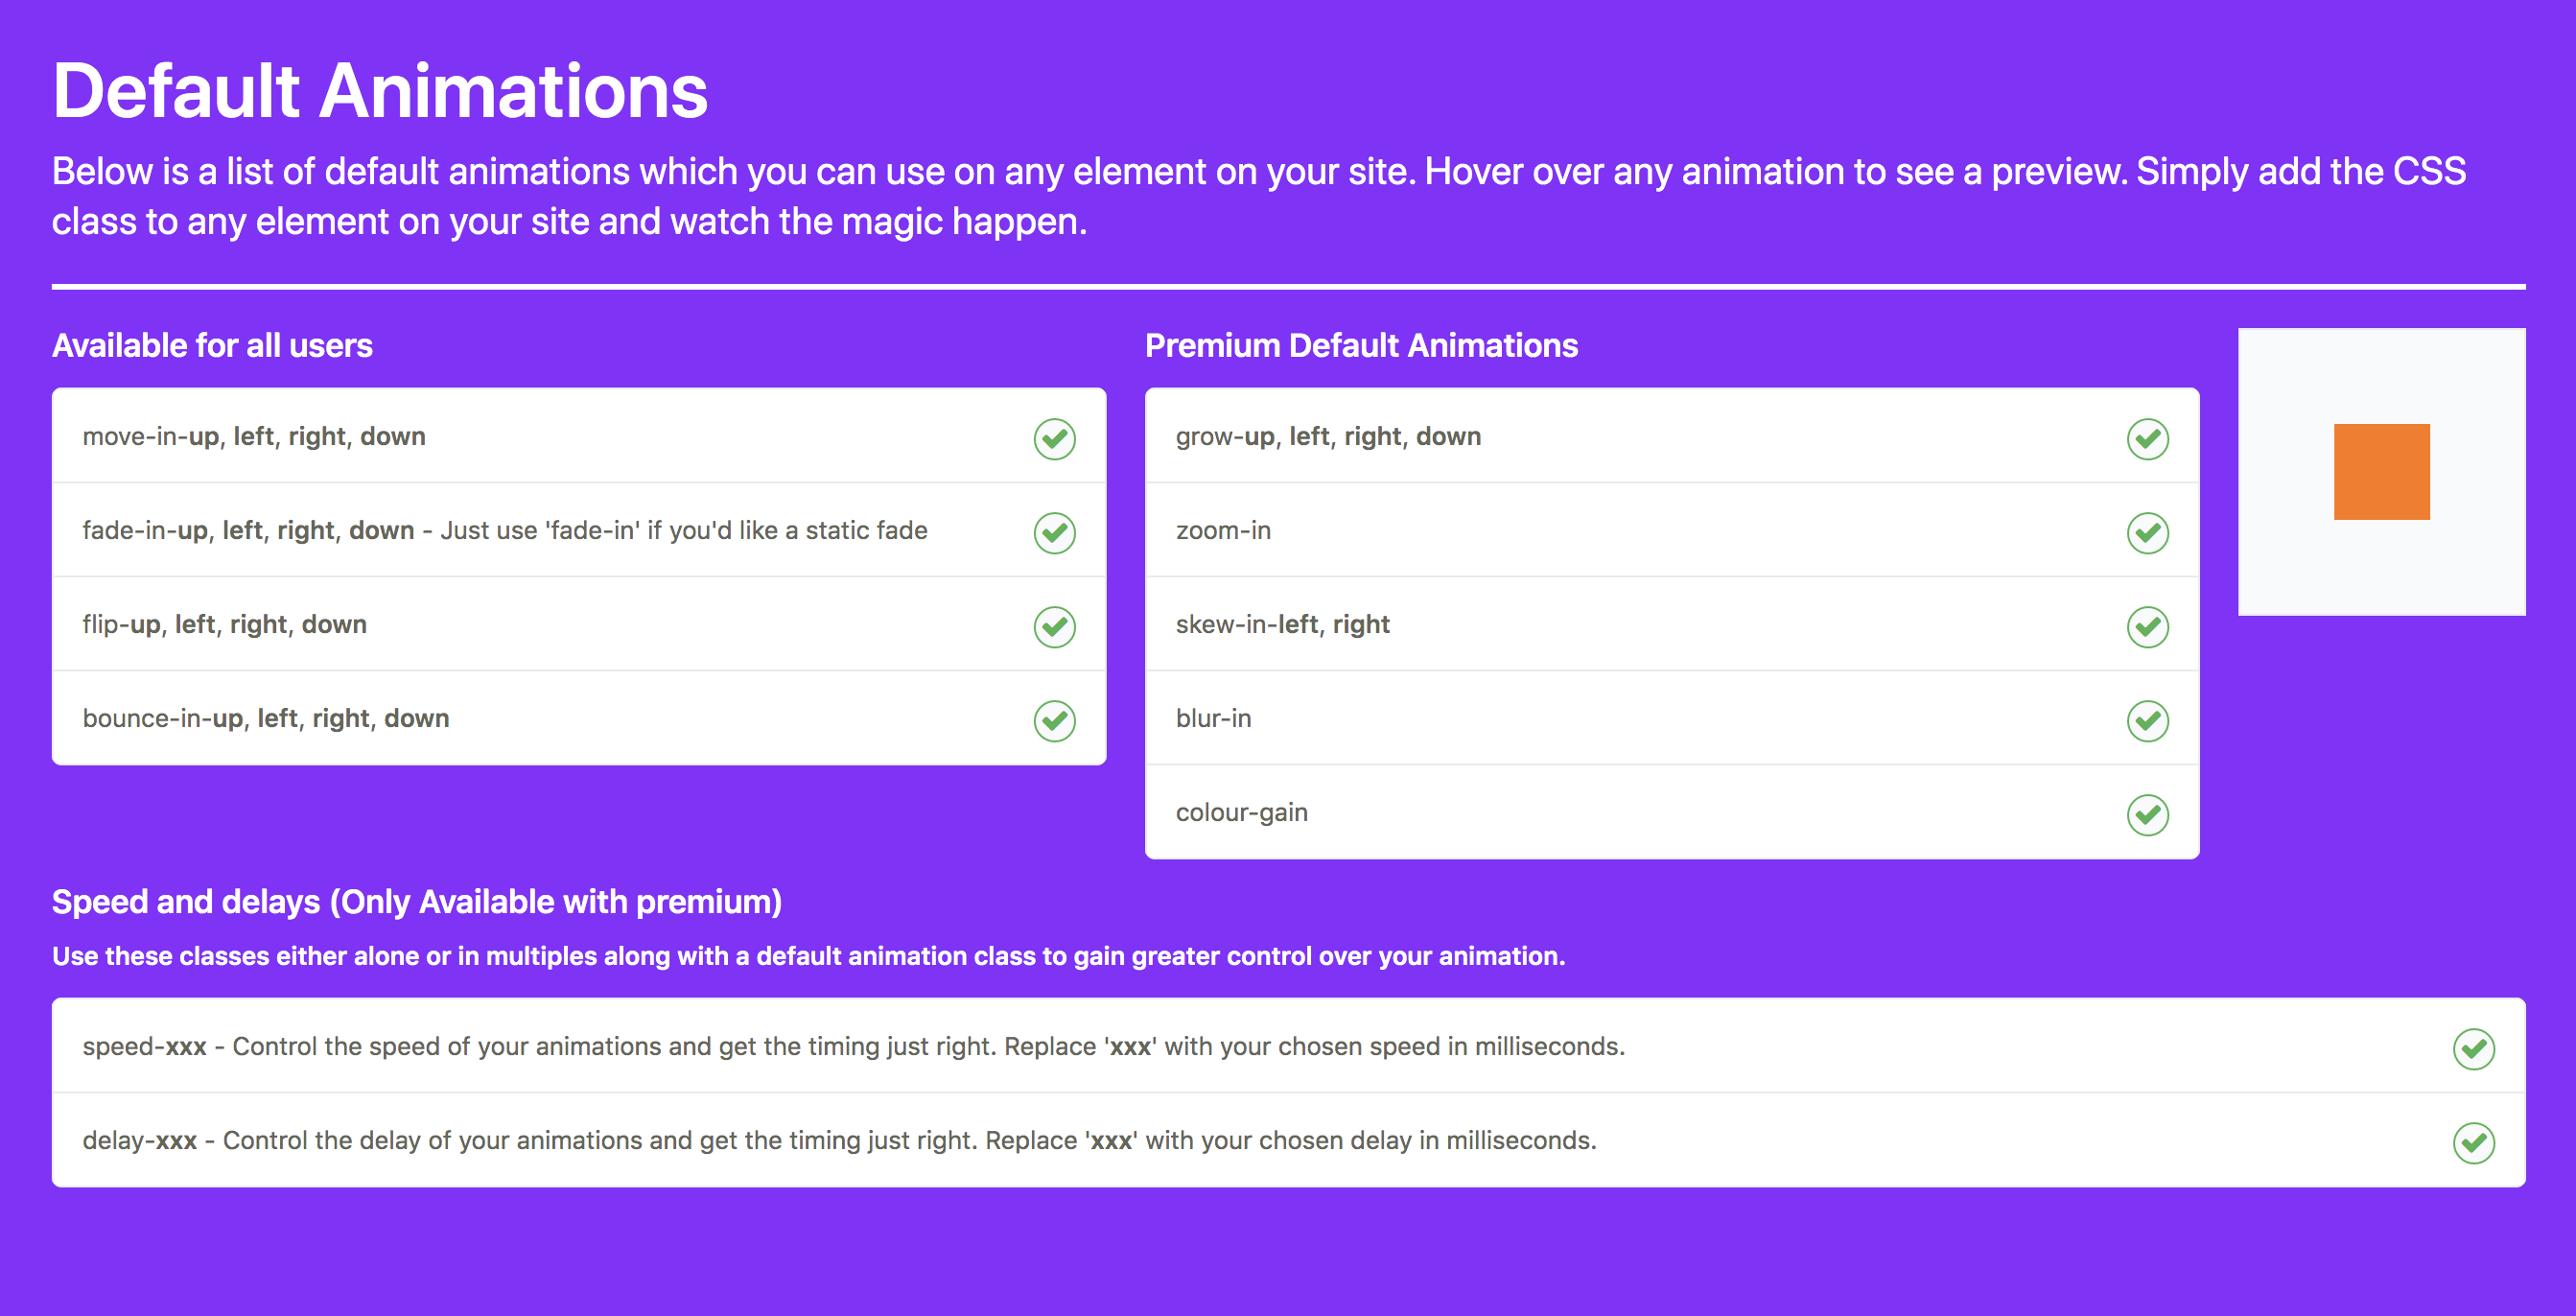
On this screen is a list of all of the animations available to you. Each line-break represents a new animation type. Hover over any of the animations to see a demonstration. The awesome thing is that you can simply add any of these classes to an item/element on your site and the animation will apply to it. There no need to touch any CSS or jQuery. Just add the class and the animations will perform as the item enters your viewport.
If you don’t know about HTML classes its nothing to be scared of, you can read up on them here.
Advanced Animations – Powerful animations, easily managed
The advanced animations tab is for those of you who want to customise things more. You can animate items on a global scope using your own CSS.
Your first step, is to activate the element you want to animate. You can activate any element by class, id or tag if you have the premium version (only tags and ids with standard version).
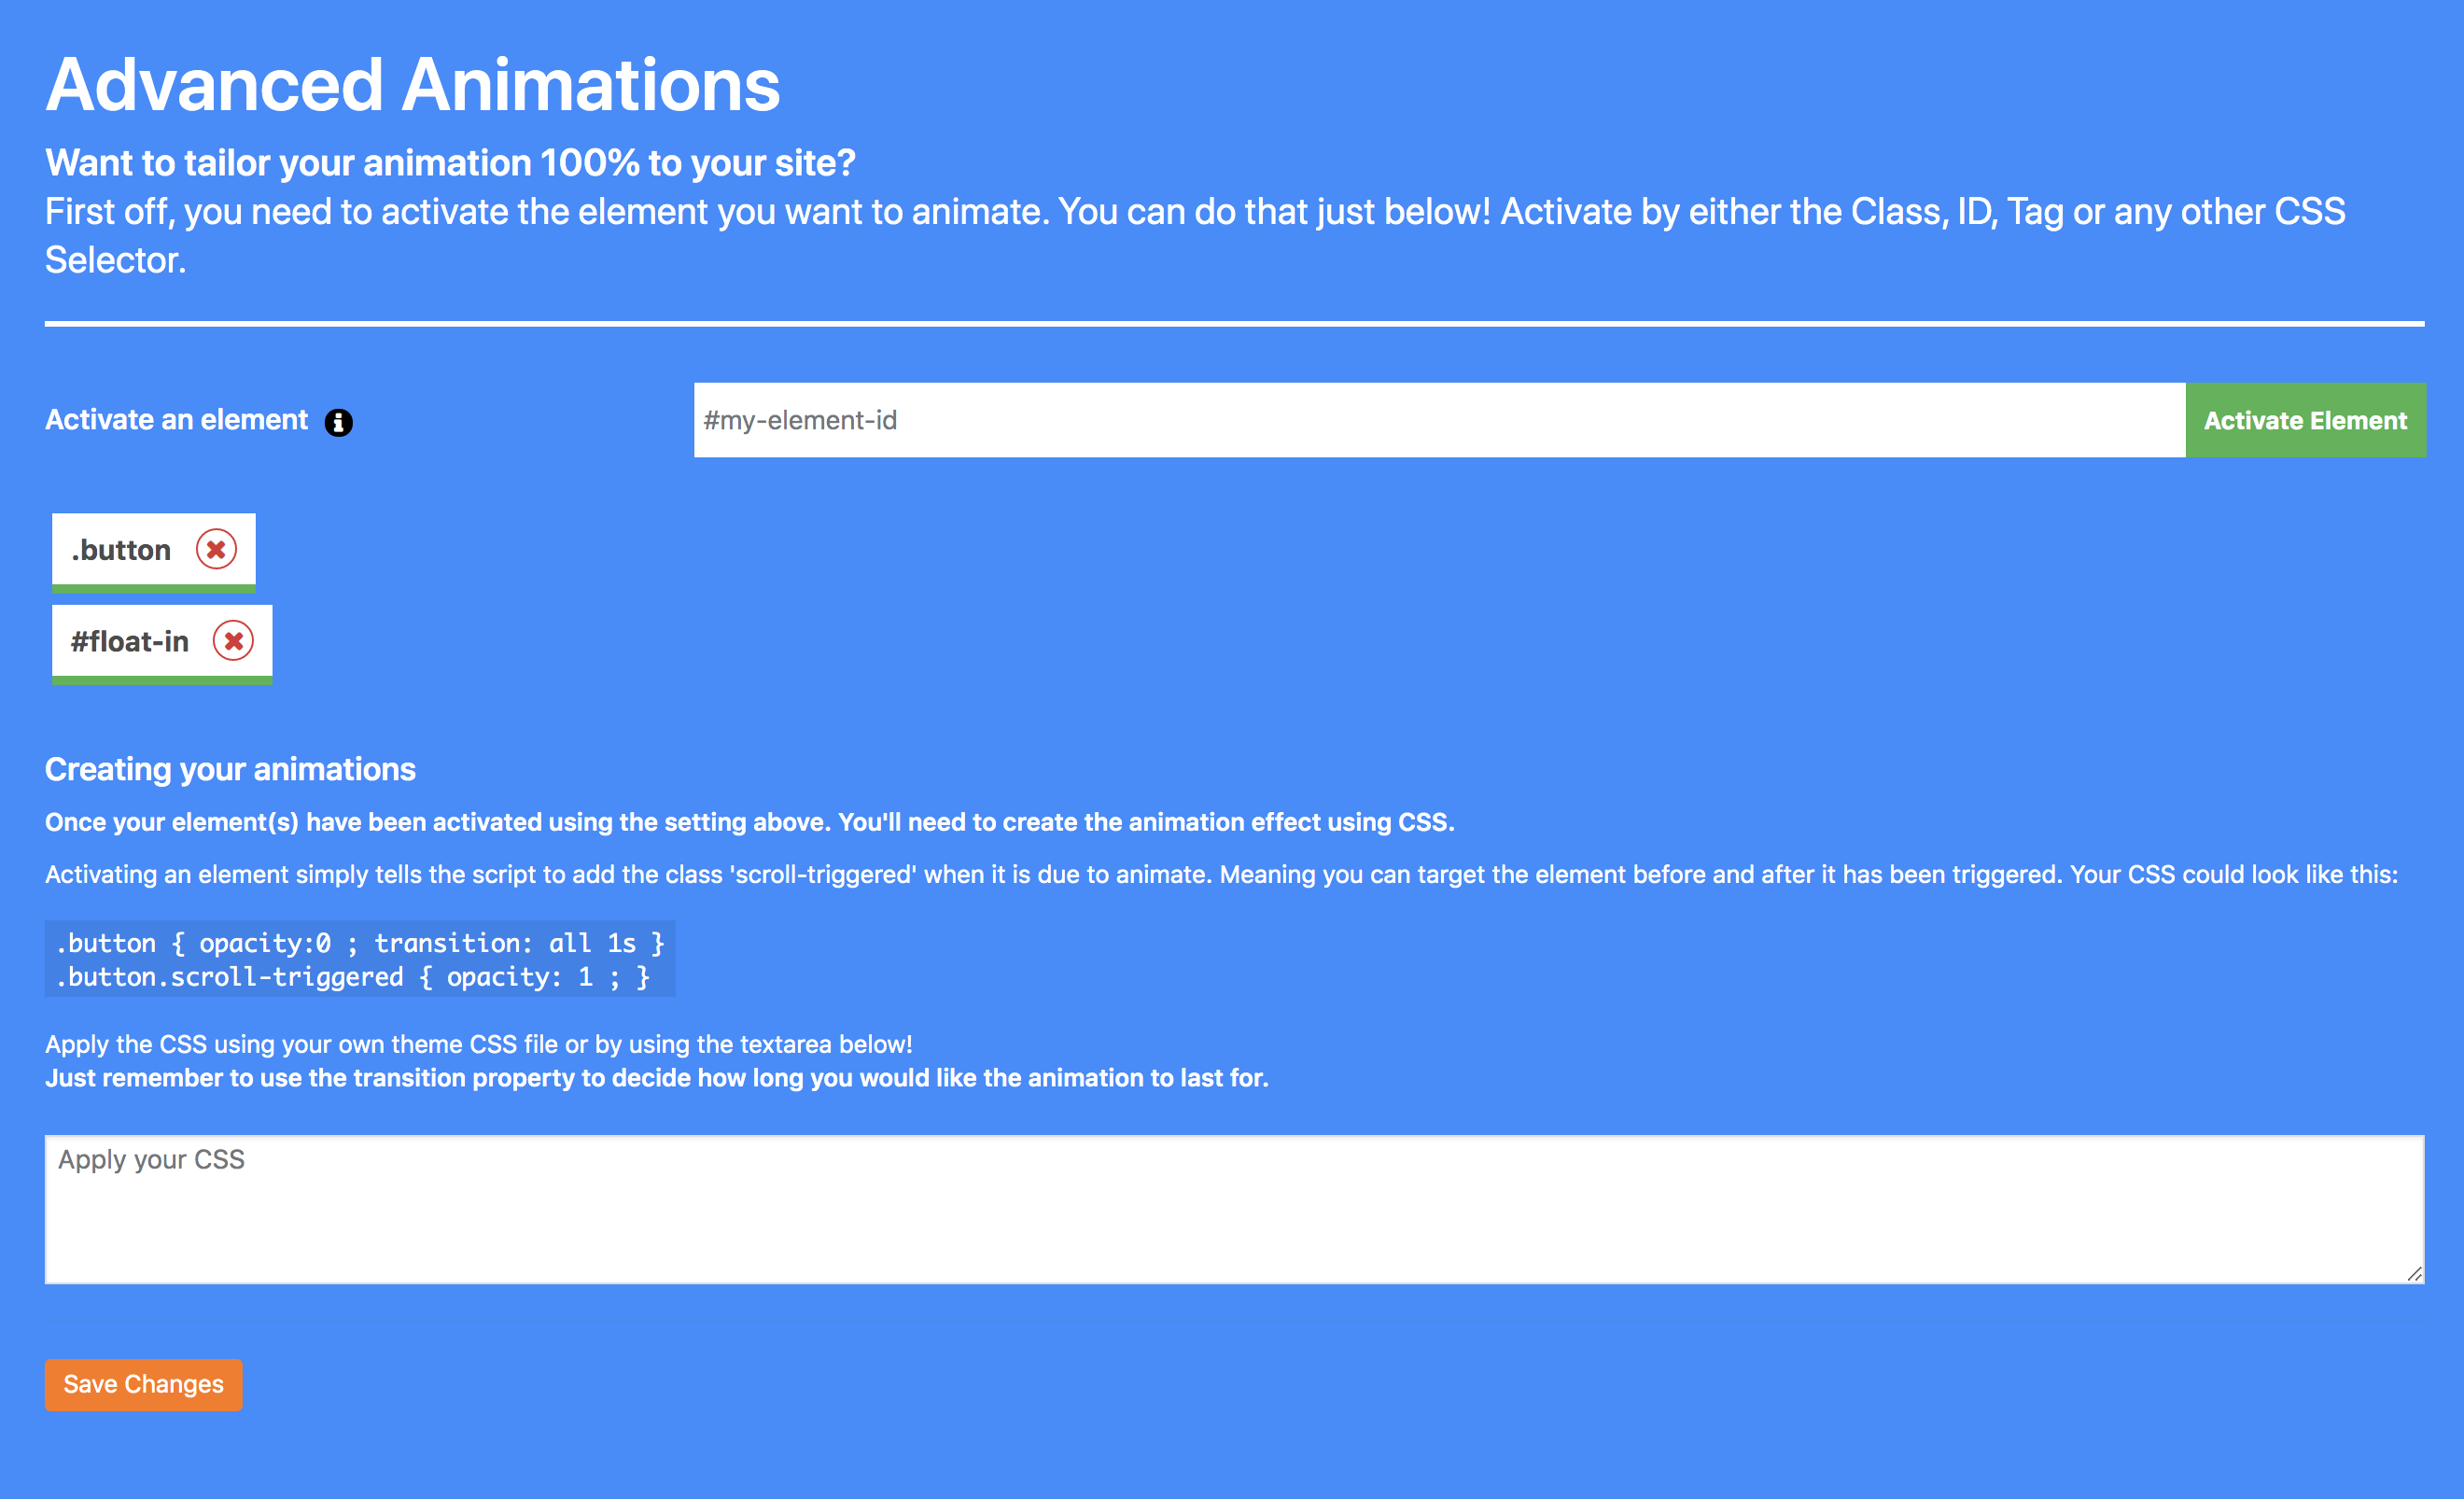
What to do after activating an element
The plugin seeks out these items on the frontend of your site and adds the class ‘scroll-triggered’ as it enters the viewport. This gives you the ability to target the element before and after it has entered your screen’s dimensions.
Now we have this knowledge we can apply our own CSS.
I want the button to fade in upwards so my CSS could look like this:
.button { opacity:0; transform:translateY(10px); transition:all .5s; }
.button.scroll-triggered { opacity:1; transform:translateY(0); }
Just remember to use the transition property to define how long you would like the animation to last.
Summary
That’s it, you’ve now got complete control over the animations on your site. Of course, there are more customizability options which we haven’t delved into within this article but we’re sure you can get your head around them.
Good luck! As always if you have any questions, please do let us know!